In the age of episodic streaming, VFX studios are making more use of Nuke Smart Vectors to perform quick fixes and hit deadlines. Below, Nuke expert Josh Parks explores Smart Vectors and reveals how to implement them into your workflow.
Smart Vectors in Nuke make it easy to perform tricky tasks quickly and efficiently and hit deadlines, so it’s no surprise the feature is popular in episodic TV workflows. Today, episodic TV visual effects can include anything from high-energy fight sequences to small tweaks like adding marks to a face for continuity or beauty work to remove unwanted wrinkles. The latter workflows especially benefit from Smart Vectors.
The Smart Vector node in Nuke produces faster, more accurate tracking data by calculating pixel motion between frames. The channel’s values represent where the pixel moves on the subsequent frame and where it came from in the previous. Smart Vectors use this information and make it super easy to essentially stick one asset element to another or remove a blemish, all with minimal work and within achievable deadlines.
Below, Nuke expert Josh Parks looks at some tips concerning how to use this handy tool in your work.
Did you know?
ftrack Studio integrates with Nuke to allow for easy tracking of tasks from directly within in Nuke.
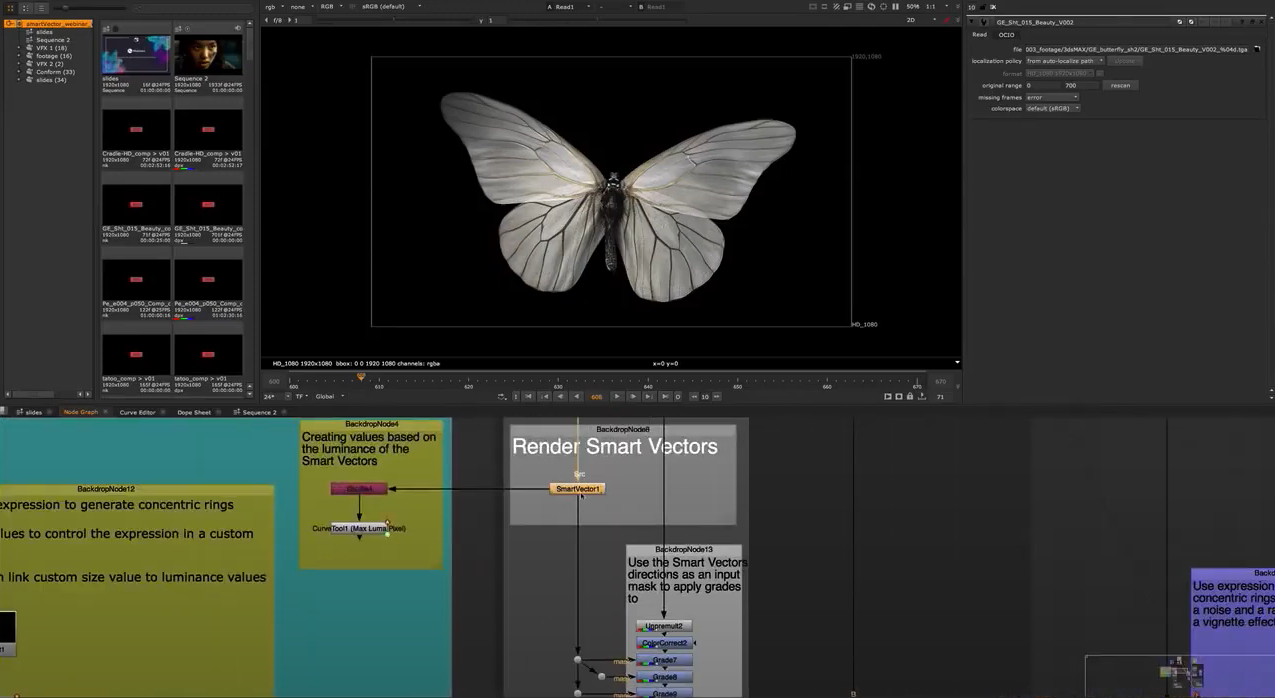
1. Keep things light – Precomp Smart Vectors as an STMap
Smart Vectors represent the movement of every pixel in your shot—that’s a lot of information to calculate, meaning Smart Vectors can be very computationally intensive. Of course, you could precomp them out. However, the problem is that you’d have to hook the precomp up to a Vector Distort node to distort your chosen image—a similarly data-heavy process.
So, how can we avoid working with information-heavy Smart Vectors? We use the STMap! You can apply your distortion to an STMap and precomp it out. You can then precomp the heavy parts of the usual Smart Vector setup and apply the movement using a lightweight STMap node.
To create an STMap, use the following expressions in the following channels of an expression node:
- Red channel: (x+0.5)/width
- Green channel: (y+0.5)/height
You will now have an STMap. You can apply your Smart Vector motion vectors to this STMap and precomp your image. Once precomped, disable the Smart Vector and Vector Distort node and apply the STMap using an STMap node. You’ll now have a less computationally intensive workflow.

2. Improve quality with Smart Vectors – Pre-treat the plate
Even when using Smart Vectors, achieving a smooth, clean image result can be difficult. Thankfully, I have a few handy tricks to make things easier. For starters, you can pretreat your plate to enhance its details (a little like when you’re working on a 2D track). This process makes it much easier for Nuke to track each pixel and results in a better-looking output.
Here are some other go-to methods I turn to whenever I have a shot and the Smart Vectors aren’t working as I’d like them to:
- Connect a Grade Node with gamma down and gain up. Doing so will increase the contrast in your image and make it easier for Nuke to track each pixel.
- Add a slight Sharpen to your image to make the details pop. You must apply this Sharpen in log space to avoid artifacts. To do so, connect a Log2Lin node and set it to “Lin2Log”. Next, connect your Sharpen node, connect another log2lin node, and convert it back from “Log2Lin”.
- Convert to a different Colourspace. Connect a Colourspace node and try going from linear to a colorspace in which the details pop out a little more.
3. Speed up your workflow – Combine multiple Smart Vectors
As with keying, it’s unlikely you’ll achieve the perfect Smart Vector output using just one setup. To attain the best result for a particular area, you’ll want to adjust settings such as Vector Detail and Strength, which will pretreat your plate in different ways.
Combining two Smart Vectors with different settings can be useful. You can do so in a few ways. The best in my experience is to keymix the outcome of two Smart Vector nodes. Doing so will create multiple Smart Vector nodes in your script. However, so you may want to apply the result of each Smart Vector node to an STMap (as described above) and precomp out. You can then keymix these STMaps for a faster workflow.
4. Use Smart Vectors to speed up your roto process
Generally speaking, Smart Vectors are used to stick one image to another. However, the feature has other uses: I’ve recently used them to speed up my roto.
Smart Vectors measure every pixel’s movement, so you gain a lot more flexibility than using a 2D tracker. Let’s use the example of a warping shirt requiring roto. As with a tracker workflow, you can roto the shirt on a frame with a little motion blur, enabling you to see the object’s true shape. Then, you can set this frame as your reference frame in the Vector Distort node and run your alpha matte through your Smart Vector setup.
Next step: cross your fingers! Although this workflow doesn’t always work, it can save a ton of time when it does. Using Smart Vectors is my go-to when I need to perform a bit of roto, and I want it done quickly.
Try Nuke in ftrack Studio
Start your free trial of ftrack Studio and see first-hand how it seamlessly integrates with Nuke for stress-free production tracking.
More from the blog